Tuesday, January 20, 2009

Inaugural Carrot Cake!


I'm off to an Inauguration Party tonight chez some good friends. I've been asked to create an "Obama cake". I was stumped, I'm not a great decorator and had no clue how to make an "Obama cake".

Thank goodness for the Internet...where you can find things like "Obama's logo stencil" for free! I downloaded, made this wonderful carrot cake from Epicurious.com (the BEST CARROT CAKE EVER), and frosted it with gobs of cream cheese frosting.

To make the design, I cut the stencil out, and used cake "glitter" which I purchased at Michael's. Et voila....an Obama-teau!

Tuesday, November 25, 2008

Daring Baker's Challenge for November: Caramel Cake


Caramel is good. Who doesn't like it? Especially salted or with good chocolate, you can't beat a good hunk of caramel. But caramel in a cake...and in its frosting...well, too much of a good thing suddenly becomes not so good anymore. That's how I feel about the Daring Bakers Challenge for November: caramel cake. A bite of this cake was good, a few bites made me wonder about when my next dental appointment was, and a piece of it made me feel pretty uneasy for the next 24 hours. Yes, I should have stopped. But I soooo wanted to like it and so I kept forcing it down.

It has to be hard to choose a recipe for the Daring Bakers group. This month this daunting task went to: Dolores, Alex, and Jenny. A huge thank you to them for doing what so many of us have never had to do. Here you have a group of well over 1,000 people around the world, all with varying abilities and tastes, and as with everything in life you simply can't please everyone. I give kudos to all those who do all the research necessary to choose a recipe for the Daring Baker's group.

Usually I'm rather challenged and pretty excited about the monthly challenges. But this cake just didn't do it for me, and I'm sure that this is just a personal opinion. The cake prep itself was very straight-forward, as was the icing. The real challenge in this cake was in making the caramel, so that's good that bakers who had never made their own caramel got a chance to do so. The cake just turned out so very sweet, even with the addition of a huge amount of fleur de sel in the icing, it was still almost inedibly sweet. I brought it to dinner for a friend's birthday, and suffice it to say that this dessert-loving group ate very little of their servings and then declined taking home the leftovers. This was not a good sign! I think the cake would have been better either unfrosted, or with a cream cheese frosting. Something to cut the sweet factor waaaay down.

So, making this cake was a good experience in caramel, but I don't think I would make it again. My always reliable taste-testers were unimpressed, and there are simply too many other great cakes out there and too little time!

The recipe can be found on the Web site of Shuna Fish Lydon, who created it.

Chocolate Espresso Macarons


More and more, I am being associated with the macarons I bring to various parties and events. After 1 1/2 years of making them, I think I finally have the right recipe and "touch"...it takes a lot of practice to get that touch. But really, once you have it you have it, and you suddenly become a macaron superstar in your circle of friends and family.

So for a recent event I brought along a few batches of macarons: chocolate, salted butter caramel, and espresso. The other two recipes are already on the blog, the espresso ones are new so I will post about them here.

These suckers pack a punch of espresso, they taste great with coffee or hot chocolate and require nothing more than a bit of espresso powder.

For Macarons:
1 1/4 cups confectioner's sugar
1 cup almond flour
3 egg whites at room temperature
3 Tb. granulated sugar
pinch of cream of tartar
caramel coloring

Blend the confectioner's sugar and the almond flour in a food processor. Begin to whip the egg whites in a stand mixer until they start to froth. Add a pinch of cream of tartar, and as they foam up more gradually add the granulated sugar. Beat until stiff.

Add the almond mixture to the egg white mixture and fold until the mixture begins to flow "like magma". I would say this will take about 40 - 60 turns of the spatula.

Fill pastry bag fitted with 1/4 " tip and make 1 inch mounds on cookie sheets lined with either parchment or a silpat. Let sit for at least 20 minutes. Sift a bit of espresso powder (not too much) on each macaron before baking. Bake in a 350 degree oven for 12 minutes.

Chocolate/Espresso Filling
4 ounces bittersweet chocolate
2 teaspoons corn syrup
1/2 cup cream
1 Tb. butter
1 tsp. espresso powder


Chop the chocolate into small pieces and place in a small to medium bowl. Heat the cream, espresso powder and corn syrup until hot and bubbles form on the outside edge of the cream. Pour the cream over the chocolate and let sit for 1 minute. Add the butter and stir until it comes together. Refrigerate until ganache is at a spreadable consistency.

Spread ganache over the flat side of one macaron cookie. Top with another macaron.

.

Wednesday, November 19, 2008

The Best Pumpkin Pie You'll Ever Eat


I'll be the first to admit that I'm not a huge fan of pumpkin pie. It's always rather gloppy and heavy, you could ball it up and throw it at the person sitting opposite you if you really wanted to. That's not appealing to me in my pie, or my dinner guest. So while perusing my Thanksgiving edition of Bon Appetit magazine, I saw an entire section devoted to the almighty pumpkin. Intrigued by some pretty good looking recipes, I decided to take on their "Pumpkin Butterscotch Pie" and go one further: I used a REAL pumpkin. No can 'o pumpkin puree for moi, I got the real thing. I had never done this in my life, and didn't know if it would make a difference.

OH MY GOD. The difference was astounding. The real pumpkin made the pie really light and smooth, almost like a light custard, rather than heavy like canned pumpkin tends to be. I've vowed that from now on, this will be my pumpkin pie recipe, and real pumpkin will be my partner in crime.

I'm cooking for zee French for Thanksgiving this year (well, not all zee French, only 3), and I'm pretty sure they've never thought to make a pumpkin into a pie. This pie will surely amaze.

(To get pumpkin puree, slice pie pumpkin (not Halloween carving pumpkin) in half, remove seeds and strings, turn upside down in about 1/2 inch of water in a pan, and bake at 350 until the pumpkin is soft, about 45 minutes. Remove the flesh from the pumpkin shell, puree in a food processor until smooth. Let cool before you use it for the pie.)

Pumpkin Butterscotch Pie

Crust:
1 1/4 cups all purpose flour
1/2 tsp. sugar
1/4 tsp salt
10 tsp chilled, unsalted butter, cut into 1/2 inch cubews
3 Tb. ice water

Filling:
3/4 cup packed golden brown sugar, divided
2 Tb. unsalted butter
1/4 tsp. salt
1/4 cup Scotch (I didn't use this)
1 1/4 cups whipping cream
1 cup canned pumpkin (or puree of one small pie pumpkin)
3 large eggs
1 tsp ground cinnamon
1/2 tsp ground ginger
1/4 tsp ground cloves
1/4 tsp ground allspice

Crust:
Mix flour, sugar and salt in processor. Add butter. Using on/off turns, process until very course meal forms. Add 3 Tb.ice water. Using on/off turns, process until moist clumps form, adding more water by teaspoonfuls if too dry. Gather dough into ball and flatten into disk. Wrap and chill for one hour.

Roll out dough to 12 - 13 inch round. Transfer to 9 inch diameter glass pie dish. Fold edges under and crimp as you wish. Chill dough until firm, about one hour.
(I used a tart pan with high sides, and i froze the dough for one hour, it eliminates bubbles while baking).

* Crust can be made one day ahead, cover unbaked crust and keep chilled.

Preheat oven to 350 degrees. Line crust with sheet of foil. Fill with pie weights or dried beans. Bake 20 minutes. Remove foil with beans. Bake until just beginning to turn golden brown, piercing with fork if bubbles form, about 15 minutes longer. Cool completely.

Filling:
Combine 1/2 cup brown sugar, butter and salt in medium saucepan. Bring to boil over medium heat, stirring to dissolve sugar. Boil until deep brown, about 5 minutes. Remove from heat. Add Scotch, then cream (mixture will bubble a lot) and whisk until smooth. Return to medium hea t and stir until most caramel bits dissolve. Strain butterscotch mixture into small bowl. Cool to room temperature, stirring occasionally.

Whisk remaining 1/4 cup brown sugar and pumpkin in large bowl. Whisk in eggs, then spices. Add reserved butterscotch mixture, whisk to blend.

*Can be made one day ahead, cover and chill, rewhisk before using.

Preheat oven to 350 degrees. Pour filling into crust. Bake until just set, about 50 minutes. Cool to room temperature, about 3 hours.

*Can be made 8 hours ahead, store at room temperature.

Saturday, November 8, 2008

Chocolate-Glazed Chocolate Tart with Fleur de Sel


If you are looking for an incredible easy dessert recipe for a chocoholic in your life, this is BY FAR the one. I jokingly refer to it as "chocolat/chocolat/chocolat" because it's basically three layers of chocolate: a chocolate cookie crust, a very smooth and truffle-like dark chocolate interior, and it is finished off with a gorgeous, shiny chocolate glaze.

The entire tart takes very little time or effort to make, and once served it disappears in no time. I've had friends beg me for the recipe, they like it so much. I found the recipe in the Paris edition of Gourmet Magazine (September, 2008...by the way, this edition is full of fabulous recipes). I have made the tart quite a few times, and after some experimentation I found that a sprinkling of fleur de sel on the finished tart makes the chocolate taste even better...it's that sweet and salty thing everyone loves. Plus, the fleur de sel looks so pretty on the shiny glaze.

Ingredients:
Crust:
9 chocolate graham crackers or chocolate cookies, finely ground (to make one cup)
5 Tb. unsalted butter, melted
1/4 cup sugar

Filling:
1 1/4 cups heavy cream
9 oz. bittersweet chocolate (not more than 65% cacao), chopped
2 large eggs
1 tsp vanilla extract
1/4 tsp salt

Glaze:
2 Tb. heavy cream
1 3/4 oz. bittersweet chocolate, finely chopped
1 tsp light corn syrup
1 Tb. warm water

For Crust:
Preheat oven to 350 degrees.
Stir together all ingredients an dpress evenly onto the bottom and up the sides of a tart pan with a removable bottom. Bake until firm, about 10 minutes. Cool for 15 - 20 minutes

For Filling:
Bring cream to a boil, then pour it over the chocolate and let stand for 5 minutes. Gently stir until smooth. Whisk together eggs, vanilla and salt in another bowl, then stir into the melted chocolate.
Pour filling into cooled crust. Bake until filling is set about 3 inches from the edge, but center is still wobbly. This will be about 20 - 25 minutes.
Cool completely in pan on rack, about one hour.

For Glaze:
Bring cream to a boil and remove from heat. Stir in chocolate until smooth. Stir in corn syrup, then warm water.
Pour glaze onto tart, then tilt and rotate tart so glaze coats top evenly. Let stand until glaze is set, about one hour.
Sprinkle fleur de sel over top of glaze. (optional)

*Tart is best the day it is made. If you need to make it earlier, make it without the glaze and chill for one day. Bring it to room temperature, then add the glaze.

Tuesday, October 28, 2008

Daring Baker's Challenge for October: Pizza!


When I discovered that this month's Daring Baker's Challenge was homemade pizza, I was all at once happy, relieved, confident and a bit under-challenged. Happy because who doesn't love pizza? Pizza is a mainstay of my regime....love it, at least once a week. Relieved, confident and under-challenged? Well, that's because I make pizza just about once a week, using this exact recipe! Oh well...at least it's something I love to make and the family loves to eat!

The recipe is excellent. It makes some great pizza dough. Some of the best I've ever had, even in a pizza restaurant. It's easy, too. The trick is, you MUST let the dough rest overnight, and you MUST be sure to use ice water and cold flour. I've made this pizza dough so many times and it hasn't always come out great, usually because I skipped one of those two steps.

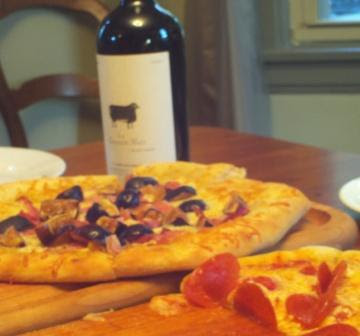
I decided to make two pizzas: one with olive oil, cheese (asiago/parmesan/mozzerella blend), figs and prosciutto for me and my husband, one with tomato sauce, cheese and pepperoni for the kids. As usual, they were gobbled up in one sitting!

Here's the recipe, and a big thank you to Rosa of Rosa's Yummy Yums for the challenge and sharing one great recipe with a lot of new pizza makers!

RECIPE SOURCE: “The Bread Baker's Apprentice: Mastering The Art of Extraordinary Bread” by Peter Reinhart. Ten Speed Press, Berkeley, CA. Copyright 2001. ISBN-10: 1-58008-268-8, ISBN-13: 978-158008-268-6.

***************

~ BASIC PIZZA DOUGH ~
Original recipe taken from “The Bread Baker’s Apprentice” by Peter Reinhart.

Makes 6 pizza crusts (about 9-12 inches/23-30 cm in diameter).

Ingredients:
4 1/2 Cups (20 1/4 ounces/607.5 g) Unbleached high-gluten (%14) bread flour or all purpose flour, chilled - FOR GF: 4 ½ cups GF Flour Blend with xanthan gum or 1 cup brown rice flour, 1 cup corn flour, 1 cup oat flour, 1 ½ cup arrowroot, potato or tapioca starch + 2 tsp xanthan or guar gum
1 3/4 Tsp Salt
1 Tsp Instant yeast - FOR GF use 2 tsp
1/4 Cup (2 ounces/60g) Olive oil or vegetable oil (both optional, but it’s better with)
1 3/4 Cups (14 ounces/420g or 420ml) Water, ice cold (40° F/4.5° C)
1 Tb sugar - FOR GF use agave syrup
Semolina/durum flour or cornmeal for dusting

DAY ONE

Method:
1. Mix together the flour, salt and instant yeast in a big bowl (or in the bowl of your stand mixer).

2. Add the oil, sugar and cold water and mix well (with the help of a large wooden spoon or with the paddle attachment, on low speed) in order to form a sticky ball of dough. On a clean surface, knead for about 5-7 minutes, until the dough is smooth and the ingredients are homogeneously distributed. If it is too wet, add a little flour (not too much, though) and if it is too dry add 1 or 2 teaspoons extra water.

NOTE: If you are using an electric mixer, switch to the dough hook and mix on medium speed for the same amount of time.The dough should clear the sides of the bowl but stick to the bottom of the bowl. If the dough is too wet, sprinkle in a little more flour, so that it clears the sides. If, on the contrary, it clears the bottom of the bowl, dribble in a teaspoon or two of cold water.
The finished dough should be springy, elastic, and sticky, not just tacky, and register 50°-55° F/10°-13° C.


5. Sprinkle some flour over the dough. Make sure your hands are dry and then flour them. Gently round each piece into a ball.

NOTE: If the dough sticks to your hands, then dip your hands into the flour again.

6. Transfer the dough balls to the lined jelly pan and mist them generously with spray oil. Slip the pan into plastic bag or enclose in plastic food wrap.

7. Put the pan into the refrigerator and let the dough rest overnight or for up to thee days.

NOTE: You can store the dough balls in a zippered freezer bag if you want to save some of the dough for any future baking. In that case, pour some oil(a few tablespooons only) in a medium bowl and dip each dough ball into the oil, so that it is completely covered in oil. Then put each ball into a separate bag. Store the bags in the freezer for no longer than 3 months. The day before you plan to make pizza, remember to transfer the dough balls from the freezer to the refrigerator.

DAY TWO

8. On the day you plan to eat pizza, exactly 2 hours before you make it, remove the desired number of dough balls from the refrigerator. Dust the counter with flour and spray lightly with oil. Place the dough balls on a floured surface and sprinkle them with flour. Dust your hands with flour and delicately press the dough into disks about 1/2 inch/1.3 cm thick and 5 inches/12.7 cm in diameter. Sprinkle with flour and mist with oil. Loosely cover the dough rounds with plastic wrap and then allow to rest for 2 hours.


9. At least 45 minutes before making the pizza, place a baking stone on the lower third of the oven. Preheat the oven as hot as possible (500° F/260° C).

NOTE: If you do not have a baking stone, then use the back of a jelly pan. Do not preheat the pan.

10. Generously sprinkle the back of a jelly pan with semolina/durum flour or cornmeal. Flour your hands (palms, backs and knuckles). Take 1 piece of dough by lifting it with a pastry scraper. Lay the dough across your fists in a very delicate way and carefully stretch it by bouncing it in a circular motion on your hands, and by giving it a little stretch with each bounce. Once the dough has expanded outward, move to a full toss.


NOTE: Make only one pizza at a time.
During the tossing process, if the dough tends to stick to your hands, lay it down on the floured counter and reflour your hands, then continue the tossing and shaping.
In case you would be having trouble tossing the dough or if the dough never wants to expand and always springs back, let it rest for approximately 5-20 minutes in order for the gluten to relax fully,then try again.
You can also resort to using a rolling pin, although it isn’t as effective as the toss method.

11. When the dough has the shape you want (about 9-12 inches/23-30 cm in diameter - for a 6 ounces/180g piece of dough), place it on the back of the jelly pan, making sure there is enough semolina/durum flour or cornmeal to allow it to slide and not stick to the pan.


12. Lightly top it with sweet or savory toppings of your choice.


NOTE: Remember that the best pizzas are topped not too generously. No more than 3 or 4 toppings (including sauce and cheese) are sufficient.

13. Slide the garnished pizza onto the stone in the oven or bake directly on the jelly pan. Close the door and bake for abour 5-8 minutes.


NOTE: After 2 minutes baking, take a peek. For an even baking, rotate 180°.

If the top gets done before the bottom, you will need to move the stone or jelly pane to a lower shelf before the next round. On the contrary, if the bottom crisps before the cheese caramelizes, then you will need to raise the stone or jelly.

14. Take the pizza out of the oven and transfer it to a cutting board or your plate. In order to allow the cheese to set a little, wait 3-5 minutes before slicing or serving.

Pierre Hermé's "Financiers"


I've been eyeing the recipe for Financiers in my Pierre Hermé cookbook for a long, long time. This is a treat I've had in France a few times, but not enough to be a real pro at what they should taste like. And usually they are not made of chocolate, but there seems to be nothing wrong with a chocolate financier! So my intrigue was at a high, all I needed was an excuse to bake them. My excuse? My French class was hungry for a treat. Enough said.

Basically, they are a chocolate almond cookie. The name translates more or less to "banker", because the pastry shop where they originated catered to many of the "financiers" in the bourse district of Paris. They are traditionally shaped like a bar of gold, but now you see them baked in boat-shaped molds. I used a baking pan with multiple mold shapes (flowers, hearts, bundts, etc.) and they turned out great.
Because of the almond flour, they are very moist and can be kept at room temperature for a number of days. Easy to make, yummy to eat...my kind of treat!

Ingredients:
3 /12 ounces (100 g) bittersweet chocolate
3 lg eggs
1/2 cup plus 1 Tb. sugar
1 cup finely ground almond powder or finely ground blanched almonds
1 stick plus 1 Tb. unsalted butter at room temperature
1/3 cup plus 2 Tb. tepid water
1/3 cup plus 2 Tb. all purpose flour, sifted

Preheat your oven to 350. Butter and flour molds (rectangular, boat shaped, something that holds about 3 Tb. water. Adjust cooking time if you have different sized molds). Place molds on jelly roll pan.

Melt chocolate in bowl over and not touching simmering water. Remove from heat and let cool slightly. It should be just warm to the touch when you use it.

With an electric stand mixer, whisk the eggs, sugar and almond powder together on medium-high speed until it is pale. Reduce speed to medium, add butter in 4 or 5 peaces and beat until just incorporated. On low speed, add chocolate and mix to blend. Add the water, increase speed to medium, and beat until it comes together.
Using a rubber spatula, fold in the flour. (This batter can be kept covered airtight in the refrigerator for a couple days).

Spoon batter into molds until they are almost filled, and bake for 15 - 18 minutes or until a knife inserted in the center comes out clean. Transfer to a cookie rack and cool for 3 minutes, then remove cookies from the molds. Cool them airtight to room temperature.

Optional: add a sprinkling of cocoa powder or confectioner's sugar